|
|
It takes a few hit and miss attempts to figure out the right amount of medium. Basically, you don’t want it too thin but you also do not want it to be too thick.
Once you have coated the entire image, carefully lay it down on the surface you are wanting to transfer onto. Smooth the paper out with your fingers until it adheres then begin burnishing it starting from the middle. With a fair amount of pressure (but not so much that you distress the image underneath) use circular motions working towards the edges making sure you don’t move the image. If movement is too difficult to control, then there is either too much medium or you began burnishing it to soon. At this point I like to set the piece aside to dry for a few hours or overnight. A hair dryer can also be user to speed up this process. When it is dry, take a wet (but not dripping) cotton cloth and lay it across the back of the transferred paper and let it sit for a minute. Slowly and lightly, begin pressing the cloth around the paper until it becomes semi-transparent and you can start seeing the image underneath. Starting in the middle of the paper, slowly rub the back with your fingers until the paper starts to come away. Working slowly and occasionally applying more water when needed, rub the entire back until another all the paper looks gone. At this point let the image dry. Once dry, you will notice a sort of white haze. This occurs because a small percentage of the paper was left behind. To remove this, start the process of wetting and rubbing again until the dry image is crisp and clear. |
|
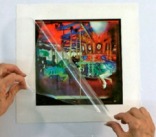
However, if using ink jet transparencies it’s not necessary to wait for the piece to dry. Ink jet transparencies require a minute or so of burnishing. Pull up a corner and peak to see if the image is transferring ok. Burnish more if it is not. Lift off the transparency if it is and voila! you are done. Materials obtainable from Spectrum Art & Office. |


