Lino and Block Printing
When Was Lino First Used for Printmaking?
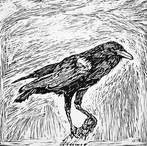
The use of lino to create art is "primarily attributed to German Expressionists such as Erich Heckel (1883-1944) and Gabriele Munter (1877-1962)"2. Russian Constructivist artists were using it by 1913, and black-and-white linocuts appeared in the UK in 1912 (attributed to Horace Brodzky). The development of color linocuts was "driven by the influence of Claude Flight (1881-1955)" who taught linocut in London at the Grosvenor School of Modern Art between 1926 and 1930.2 Picasso is known to have produced his first linocuts in 1939 and continued doing so into the early 1960s. Matisse also made linocuts. Another artist famous for his linocuts is Namibian John Ndevasia Muafangejo. His prints often contain explanatory words or narratives in English on them. Block printing is a method of placing permanent designs on surfaces by carving a pattern on a wood and like with lino, inking it, and transferring it to the paper. From the Orient, block printing found its way into Europe about the year 1423. Here it was taken up and improved, until in Germany Purer brought it to such a peak of perfection that few artists in the craft have ever been able to surpass his work.
Step 2: Carve out the positive (open/blank) space Take a minute to look at your drawing and decide which areas you want to leave and which areas you want to carve away. Remember that the raised areas will be what shows up in the ink. My biggest mistake when I first started, was trying to carve too deep into the linoleum. You really don't have to carve deep at all, just along the surface. The tools are sharp, and you can cut yourself so use with caution.
Step 3: Ink your block
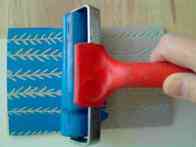
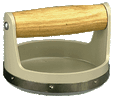
Squeeze a small amount of ink onto a glass sheet. Take your rubber roller and roll the ink out into a smooth, thin layer. Then careful roll the inked brayer onto the surface of your block. All of the raised areas will accept the ink. Step 4: Pulling your print Center a piece of paper on top of the inked block. Using a large metal or wooden spoon to burnish (rub) the paper with even pressure. This "pulls" the ink from the block onto the paper. Carefully peel the paper from the block & allow it to dry.
|
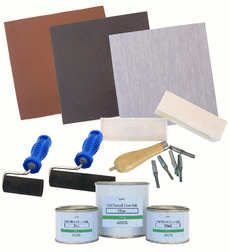
Lino Materials are obtainable from Spectrum Art & Office of 415 Umgeni Rd, Durban
